Quickstart guide
Prerequisites
We expect that you're already familiar with the core concepts and have followed the integrations instructions for your environment.
This quickstart guide assumes that BunkerWeb is accessible from the Internet and that you have configured at least two domains: one for the web UI and one for your web service.
System requirements
The minimum recommended specifications for BunkerWeb are a machine with 2 (v)CPUs and 8 GB of RAM. Please note that this should be sufficient for testing environments or setups with very few services.
For production environments with many services to protect, we recommend at least 4 (v)CPUs and 16 GB of RAM. Resources should be adjusted based on your use case, network traffic, and potential DDoS attacks you may face.
It is highly recommended to enable global loading of CRS rules (by setting the USE_MODSECURITY_GLOBAL_CRS parameter to yes) if you are in environments with limited RAM or in production with many services. More details can be found in the advanced usages section of the documentation.
This quickstart guide will help you to quickly install BunkerWeb and secure a web service using the web User Interface.
Protecting existing web applications already accessible with the HTTP(S) protocol is the main goal of BunkerWeb: it will act as a classical reverse proxy with extra security features.
See the examples folder of the repository to get real-world examples.
Basic setup
To deploy the all-in-one container, run the following command:
docker run -d \
  --name bunkerweb-aio \
  -v bw-storage:/data \
  -p 80:8080/tcp \
  -p 443:8443/tcp \
  -p 443:8443/udp \
  bunkerity/bunkerweb-all-in-one:1.6.13
By default, the container exposes:
- 8080/tcp for HTTP
- 8443/tcp for HTTPS
- 8443/udp for QUIC
- 7000/tcp for the web UI access without BunkerWeb in front (not recommended for production)
The All-In-One image comes with several built-in services, which can be controlled using environment variables. See the All-In-One (AIO) Image section of the integrations page for more details.
Use the Easy Install script to set up BunkerWeb on supported Linux distributions. It automatically installs and configures NGINX, adds the BunkerWeb repository, and sets up the required services.
# Download the script and its checksum
curl -fsSL -O https://github.com/bunkerity/bunkerweb/releases/download/v1.6.13/install-bunkerweb.sh
curl -fsSL -O https://github.com/bunkerity/bunkerweb/releases/download/v1.6.13/install-bunkerweb.sh.sha256

# Verify the checksum
sha256sum -c install-bunkerweb.sh.sha256

# If the check is successful, run the script
chmod +x install-bunkerweb.sh
sudo ./install-bunkerweb.sh
Security Notice
Always verify the script integrity with the provided checksum before executing it.
Easy Install Highlights
- Detects your Linux distribution and CPU architecture up front and warns if you are outside the supported matrix before making any change.
- Interactive prompts use an inline TUI via gum — arrow-key menus with a
❯cursor, masked password fields. On first interactive run the installer downloads the officialgumbinary from the GitHub release (SHA256-pinned, with optional cosign signature verification when cosign is installed), runs it from a tempdir, and removes the tempdir on exit — no system package is installed, no apt/dnf source is added, no binary is left behind. If gum cannot be obtained, the installer uses any pre-installedwhiptailfor boxed dialogs; if neither is available it falls back to plain text prompts. - TUI behavior is controlled by two flags:
--no-tui(orBW_INSTALL_TUI=no) skips every TUI tier and uses plain text prompts;--tuirequires a working TUI and aborts if gum cannot be fetched and no existing whiptail is available. - When the installer is piped (
curl … | bash) or stdin is not a TTY, it exits with a clear error instead of falling through every default. Use--yestogether with the appropriate--*flags /*_INPUTenv vars for non-interactive installs. - The interactive flow lets you pick the installation profile (Full Stack, Manager, Worker, etc.); Manager mode binds the internal API listener to
0.0.0.0, disables the setup wizard, and asks for the whitelist IP (pass it with--manager-ipfor non-interactive runs), while Worker mode requires the Manager IPs for its whitelist. - Manager installations can still decide whether the Web UI service should start even though the wizard remains disabled.
- The summary now shows whether the FastAPI service will run so you can intentionally enable or disable it with
--api/--no-api. - CrowdSec is prompted interactively for Full Stack installs. On the CLI,
--crowdsecand--crowdsec-appsecare valid for Full Stack and Manager installs; Worker, Scheduler-only, UI-only, and API-only modes reject them.
For advanced installation methods (package manager, installation types, non-interactive flags, CrowdSec integration, etc.), see the Linux Integration.
Here is the full docker compose file that you can use; please note that we will later connect the web service to the bw-services network:
x-bw-env: &bw-env
  # We use an anchor to avoid repeating the same settings for both services
  API_WHITELIST_IP: "127.0.0.0/8 10.20.30.0/24" # Make sure to set the correct IP range so the scheduler can send the configuration to the instance
  # Optional: set an API token and mirror it in both containers
  API_TOKEN: ""
  DATABASE_URI: "mariadb+pymysql://bunkerweb:changeme@bw-db:3306/db" # Remember to set a stronger password for the database

services:
  bunkerweb:
    # This is the name that will be used to identify the instance in the Scheduler
    image: bunkerity/bunkerweb:1.6.13
    ports:
      - "80:8080/tcp"
      - "443:8443/tcp"
      - "443:8443/udp" # For QUIC / HTTP3 support
    environment:
      <<: *bw-env # We use the anchor to avoid repeating the same settings for all services
    restart: "unless-stopped"
    networks:
      - bw-universe
      - bw-services

  bw-scheduler:
    image: bunkerity/bunkerweb-scheduler:1.6.13
    environment:
      <<: *bw-env
      BUNKERWEB_INSTANCES: "bunkerweb" # Make sure to set the correct instance name
      SERVER_NAME: ""
      MULTISITE: "yes"
      UI_HOST: "http://bw-ui:7000" # Change it if needed
      USE_REDIS: "yes"
      REDIS_HOST: "redis"
    volumes:
      - bw-storage:/data # This is used to persist the cache and other data like the backups
    restart: "unless-stopped"
    networks:
      - bw-universe
      - bw-db

  bw-ui:
    image: bunkerity/bunkerweb-ui:1.6.13
    environment:
      <<: *bw-env
    restart: "unless-stopped"
    networks:
      - bw-universe
      - bw-db

  bw-db:
    image: mariadb:11
    # We set the max allowed packet size to avoid issues with large queries
    command: --max-allowed-packet=67108864
    environment:
      MYSQL_RANDOM_ROOT_PASSWORD: "yes"
      MYSQL_DATABASE: "db"
      MYSQL_USER: "bunkerweb"
      MYSQL_PASSWORD: "changeme" # Remember to set a stronger password for the database
    volumes:
      - bw-data:/var/lib/mysql
    restart: "unless-stopped"
    networks:
      - bw-db

  redis: # Redis service for the persistence of reports/bans/stats
    image: redis:8-alpine
    command: >
      redis-server
      --maxmemory 256mb
      --maxmemory-policy volatile-lru
      --save 60 1000
      --appendonly yes
    volumes:
      - redis-data:/data
    restart: "unless-stopped"
    networks:
      - bw-universe

volumes:
  bw-data:
  bw-storage:
  redis-data:

networks:
  bw-universe:
    name: bw-universe
    ipam:
      driver: default
      config:
        - subnet: 10.20.30.0/24 # Make sure to set the correct IP range so the scheduler can send the configuration to the instance
  bw-services:
    name: bw-services
  bw-db:
    name: bw-db
Here is the full docker compose file that you can use; please note that we will later connect the web service to the bw-services network:
x-ui-env: &bw-ui-env
  # We anchor the environment variables to avoid duplication
  AUTOCONF_MODE: "yes"
  DATABASE_URI: "mariadb+pymysql://bunkerweb:changeme@bw-db:3306/db" # Remember to set a stronger password for the database

services:
  bunkerweb:
    image: bunkerity/bunkerweb:1.6.13
    ports:
      - "80:8080/tcp"
      - "443:8443/tcp"
      - "443:8443/udp" # For QUIC / HTTP3 support
    labels:
      - "bunkerweb.INSTANCE=yes" # We set the instance label to allow the autoconf to detect the instance
    environment:
      AUTOCONF_MODE: "yes"
      API_WHITELIST_IP: "127.0.0.0/8 10.20.30.0/24"
    restart: "unless-stopped"
    networks:
      - bw-universe
      - bw-services

  bw-scheduler:
    image: bunkerity/bunkerweb-scheduler:1.6.13
    environment:
      <<: *bw-ui-env
      BUNKERWEB_INSTANCES: ""
      SERVER_NAME: ""
      API_WHITELIST_IP: "127.0.0.0/8 10.20.30.0/24"
      MULTISITE: "yes"
      UI_HOST: "http://bw-ui:7000" # Change it if needed
      USE_REDIS: "yes"
      REDIS_HOST: "redis"
    volumes:
      - bw-storage:/data # This is used to persist the cache and other data like the backups
    restart: "unless-stopped"
    networks:
      - bw-universe
      - bw-db

  bw-autoconf:
    image: bunkerity/bunkerweb-autoconf:1.6.13
    depends_on:
      - bw-docker
    environment:
      <<: *bw-ui-env
      DOCKER_HOST: "tcp://bw-docker:2375"
    restart: "unless-stopped"
    networks:
      - bw-universe
      - bw-docker
      - bw-db

  bw-docker:
    image: tecnativa/docker-socket-proxy:nightly
    volumes:
      - /var/run/docker.sock:/var/run/docker.sock:ro
    environment:
      CONTAINERS: "1"
      LOG_LEVEL: "warning"
    networks:
      - bw-docker

  bw-ui:
    image: bunkerity/bunkerweb-ui:1.6.13
    environment:
      <<: *bw-ui-env
      TOTP_ENCRYPTION_KEYS: "mysecret" # Remember to set a stronger secret key (see the Prerequisites section)
    restart: "unless-stopped"
    networks:
      - bw-universe
      - bw-db

  bw-db:
    image: mariadb:11
    # We set the max allowed packet size to avoid issues with large queries
    command: --max-allowed-packet=67108864
    environment:
      MYSQL_RANDOM_ROOT_PASSWORD: "yes"
      MYSQL_DATABASE: "db"
      MYSQL_USER: "bunkerweb"
      MYSQL_PASSWORD: "changeme" # Remember to set a stronger password for the database
    volumes:
      - bw-data:/var/lib/mysql
    restart: "unless-stopped"
    networks:
      - bw-db

  redis: # Redis service for the persistence of reports/bans/stats
    image: redis:8-alpine
    command: >
      redis-server
      --maxmemory 256mb
      --maxmemory-policy volatile-lru
      --save 60 1000
      --appendonly yes
    volumes:
      - redis-data:/data
    restart: "unless-stopped"
    networks:
      - bw-universe

volumes:
  bw-data:
  bw-storage:
  redis-data:

networks:
  bw-universe:
    name: bw-universe
    ipam:
      driver: default
      config:
        - subnet: 10.20.30.0/24
  bw-services:
    name: bw-services
  bw-docker:
    name: bw-docker
  bw-db:
    name: bw-db
The recommended way to install Kubernetes is to use the Helm chart available at https://repo.bunkerweb.io/charts:
helm repo add bunkerweb https://repo.bunkerweb.io/charts
You can then use the bunkerweb helm chart from that repository:
helm install mybw bunkerweb/bunkerweb --namespace bunkerweb --create-namespace
Once installed, you can get the IP address of the LoadBalancer to set up your domains:
kubectl -n bunkerweb get svc mybw-external -o=jsonpath='{.status.loadBalancer.ingress[0].ip}'
Deprecated
The Swarm integration is deprecated and will be removed in a future release. Please consider using the Kubernetes integration instead.
More information can be found in the Swarm integration documentation.
Here is the full docker compose stack file that you can use; please note that we will later connect the web service to the bw-services network:
x-ui-env: &bw-ui-env
  # We anchor the environment variables to avoid duplication
  SWARM_MODE: "yes"
  DATABASE_URI: "mariadb+pymysql://bunkerweb:changeme@bw-db:3306/db" # Remember to set a stronger password for the database

services:
  bunkerweb:
    image: bunkerity/bunkerweb:1.6.13
    ports:
      - published: 80
        target: 8080
        mode: host
        protocol: tcp
      - published: 443
        target: 8443
        mode: host
        protocol: tcp
      - published: 443
        target: 8443
        mode: host
        protocol: udp # For QUIC / HTTP3 support
    environment:
      SWARM_MODE: "yes"
      API_WHITELIST_IP: "127.0.0.0/8 10.20.30.0/24"
    restart: "unless-stopped"
    networks:
      - bw-universe
      - bw-services
    deploy:
      mode: global
      placement:
        constraints:
          - "node.role == worker"
      labels:
        - "bunkerweb.INSTANCE=yes"

  bw-scheduler:
    image: bunkerity/bunkerweb-scheduler:1.6.13
    environment:
      <<: *bw-ui-env
      BUNKERWEB_INSTANCES: ""
      SERVER_NAME: ""
      API_WHITELIST_IP: "127.0.0.0/8 10.20.30.0/24"
      MULTISITE: "yes"
      USE_REDIS: "yes"
      REDIS_HOST: "bw-redis"
      UI_HOST: "http://bw-ui:7000" # Change it if needed
    volumes:
      - bw-storage:/data # This is used to persist the cache and other data like the backups
    restart: "unless-stopped"
    networks:
      - bw-universe
      - bw-db

  bw-autoconf:
    image: bunkerity/bunkerweb-autoconf:1.6.13
    environment:
      <<: *bw-ui-env
      DOCKER_HOST: "tcp://bw-docker:2375"
    restart: "unless-stopped"
    networks:
      - bw-universe
      - bw-docker
      - bw-db

  bw-docker:
    image: tecnativa/docker-socket-proxy:nightly
    volumes:
      - /var/run/docker.sock:/var/run/docker.sock:ro
    environment:
      CONFIGS: "1"
      CONTAINERS: "1"
      SERVICES: "1"
      SWARM: "1"
      TASKS: "1"
      LOG_LEVEL: "warning"
    networks:
      - bw-docker
    deploy:
      placement:
        constraints:
          - "node.role == manager"

  bw-ui:
    image: bunkerity/bunkerweb-ui:1.6.13
    environment:
      <<: *bw-ui-env
      TOTP_ENCRYPTION_KEYS: "mysecret" # Remember to set a stronger secret key (see the Prerequisites section)
    restart: "unless-stopped"
    networks:
      - bw-universe
      - bw-db

  bw-db:
    image: mariadb:11
    # We set the max allowed packet size to avoid issues with large queries
    command: --max-allowed-packet=67108864
    environment:
      MYSQL_RANDOM_ROOT_PASSWORD: "yes"
      MYSQL_DATABASE: "db"
      MYSQL_USER: "bunkerweb"
      MYSQL_PASSWORD: "changeme" # Remember to set a stronger password for the database
    volumes:
      - bw-data:/var/lib/mysql
    restart: "unless-stopped"
    networks:
      - bw-db

  bw-redis:
    image: redis:8-alpine
    networks:
      - bw-universe

volumes:
  bw-data:
  bw-storage:

networks:
  bw-universe:
    name: bw-universe
    driver: overlay
    attachable: true
    ipam:
      config:
        - subnet: 10.20.30.0/24
  bw-services:
    name: bw-services
    driver: overlay
    attachable: true
  bw-docker:
    name: bw-docker
    driver: overlay
    attachable: true
  bw-db:
    name: bw-db
    driver: overlay
    attachable: true
Complete the setup wizard
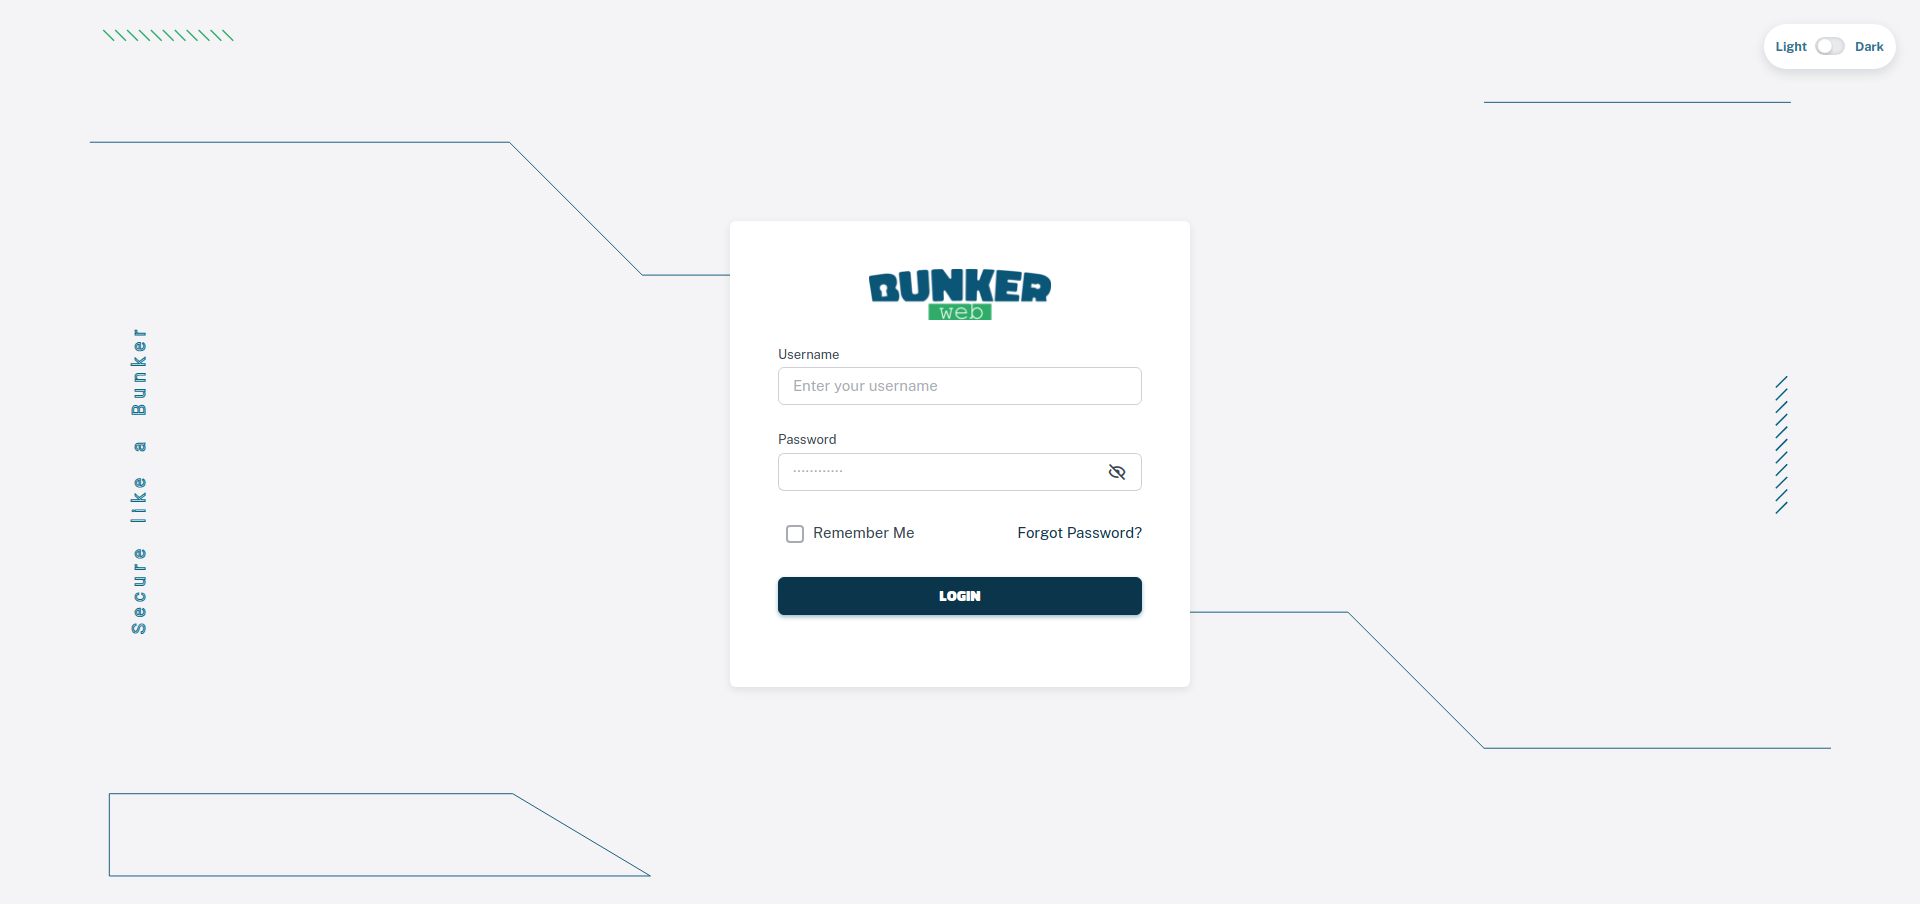
Accessing the setup wizard
You can access the setup wizard by browsing the https://your-fqdn-or-ip-addresss/setup URI of your server.
Create an Administrator account
You should see a setup page just like this one:

Once you're on the setup page, you can enter the administrator username, email, and password and click on the "Next" button.
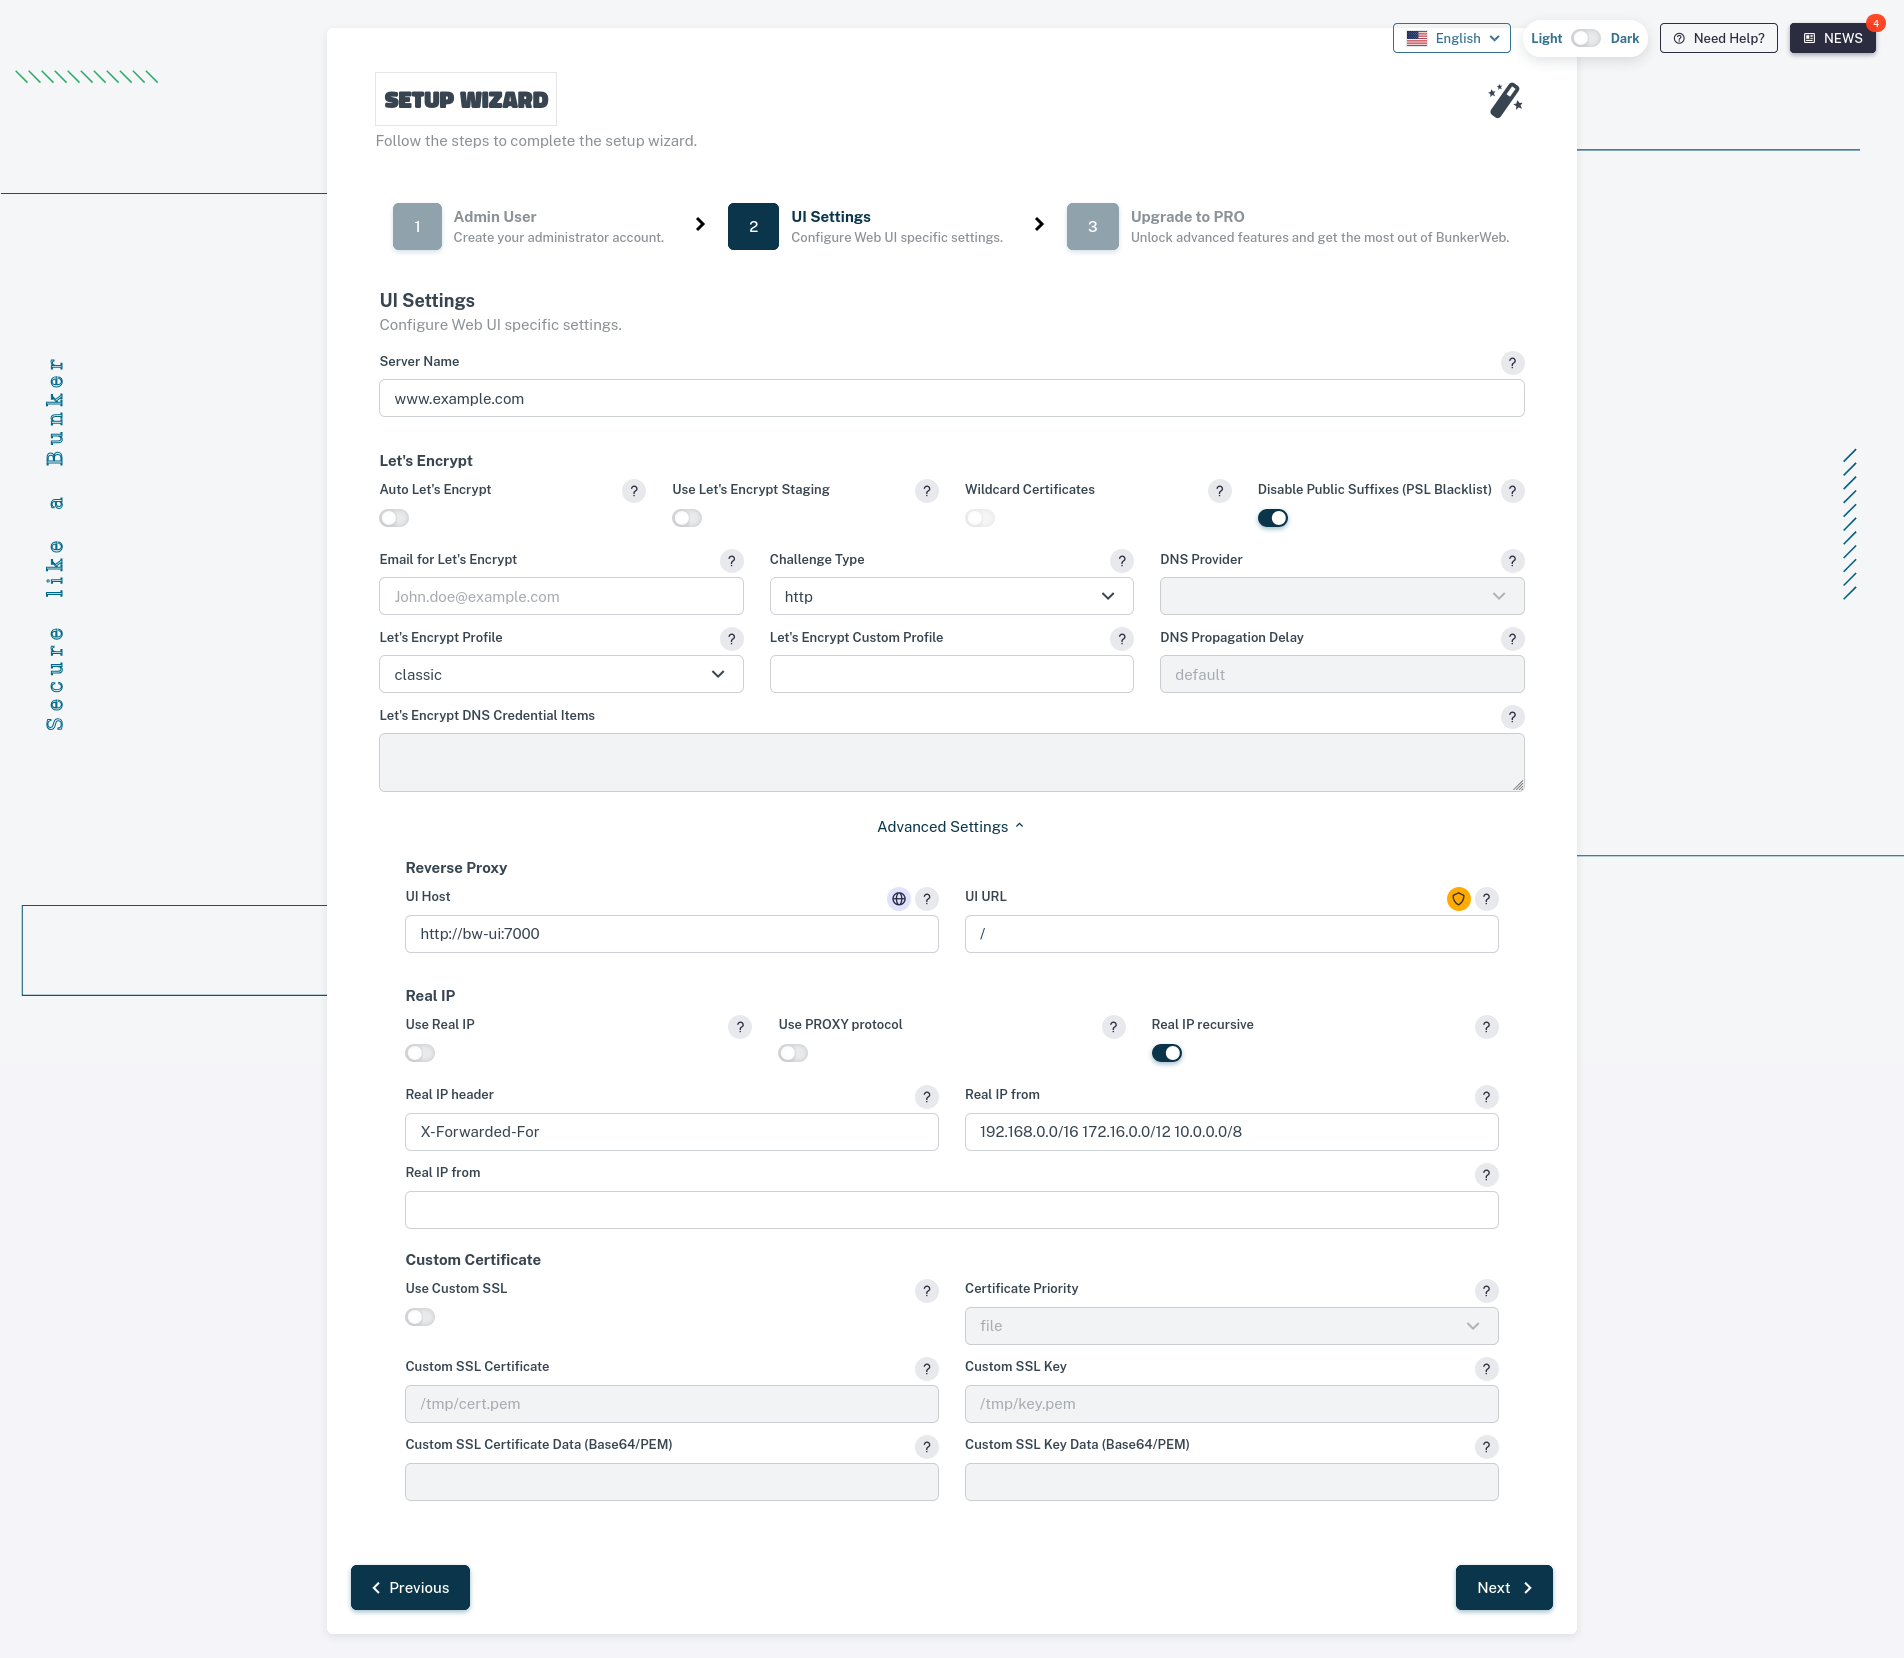
Configure the Reverse Proxy, HTTPS and other advanced settings
The next step will ask you to enter the server name (domain/FQDN) that the web UI will use.
You can also choose to enable Let's Encrypt
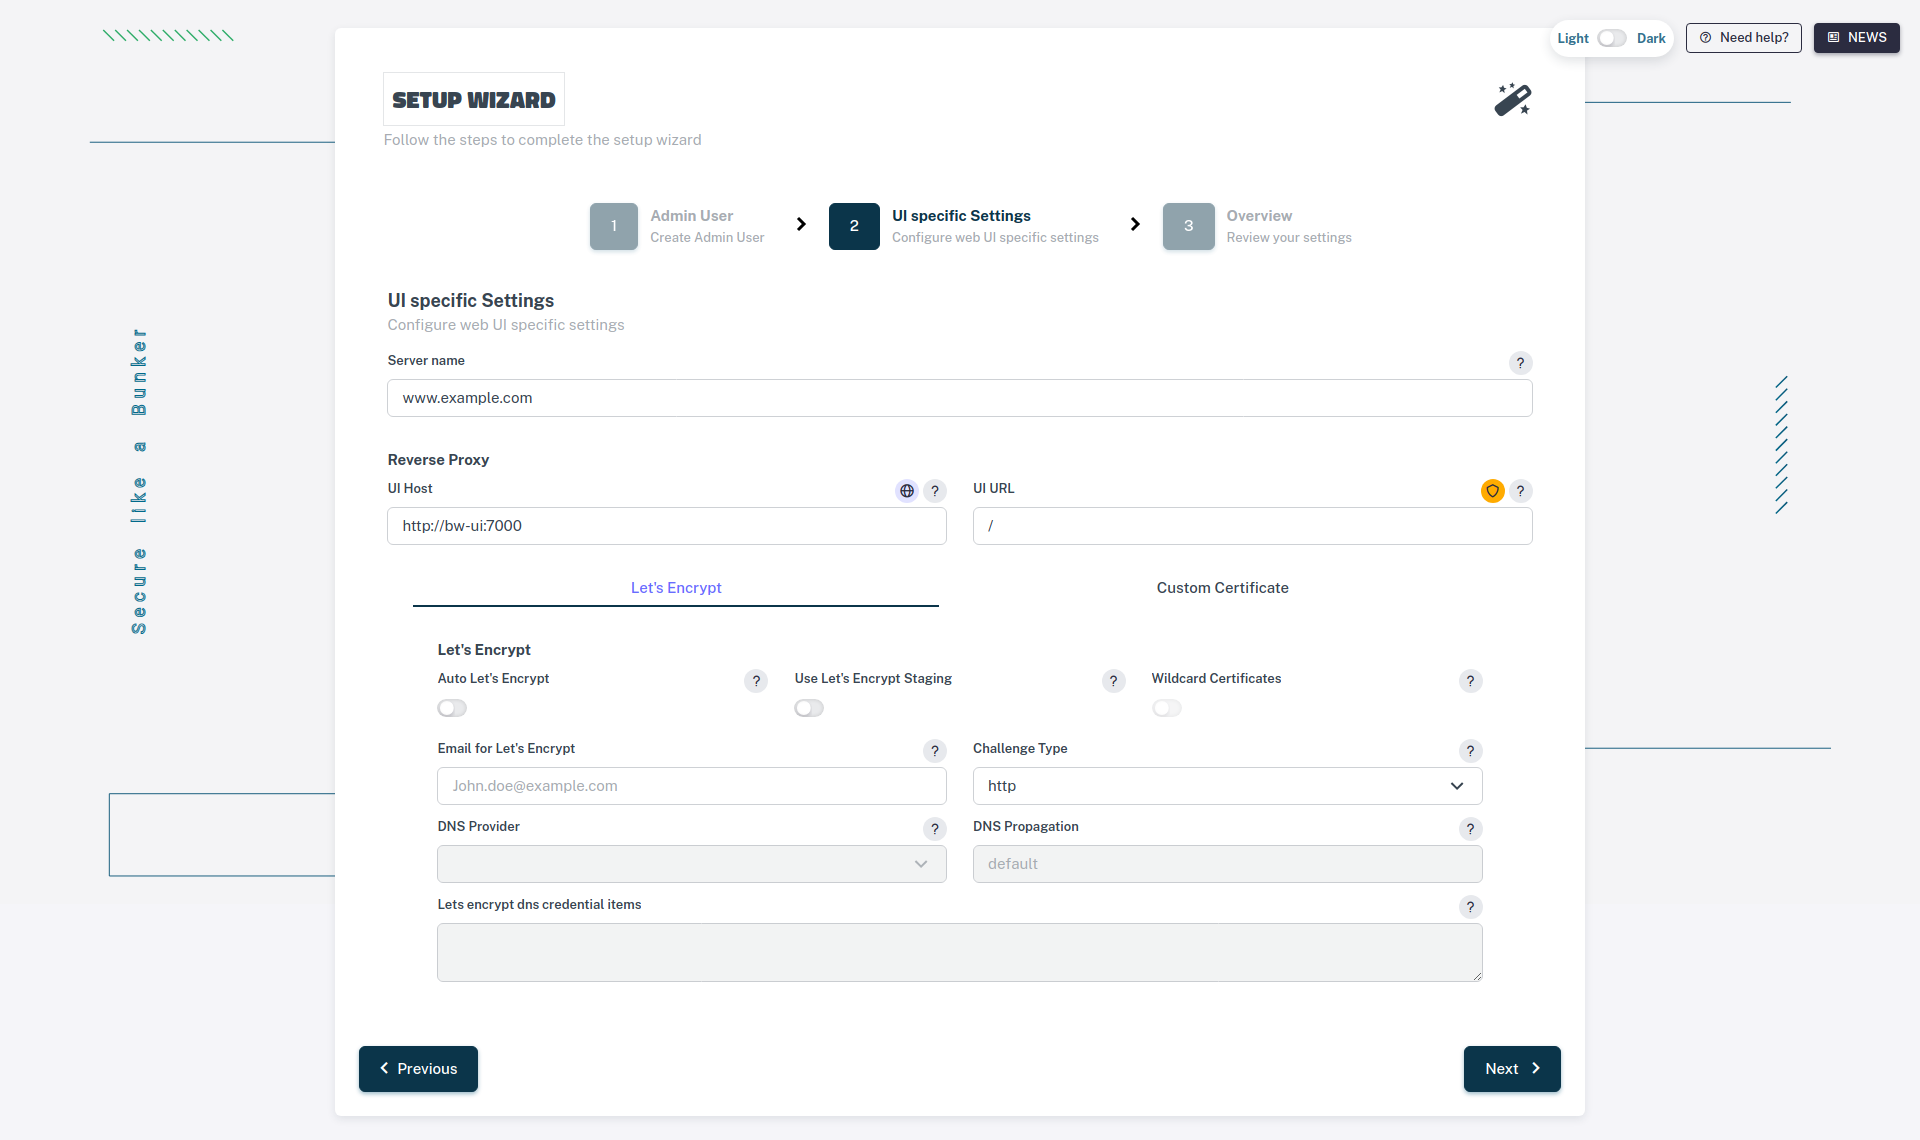
The next step will ask you to enter the server name (domain/FQDN) that the web UI will use.
You can also choose to enable Let's Encrypt.
If you expand the Advanced settings section, you can also configure the following options:
- Reverse Proxy: Tweak the Reverse Proxy settings for your administrator interface (e.g., if you want to use a path).
- Real IP: Configure the Real IP settings to properly identify the client's IP address (e.g., if you are behind a load balancer or a CDN).
- Custom Certificate: Upload a custom TLS certificate if you don't want to use Let's Encrypt.
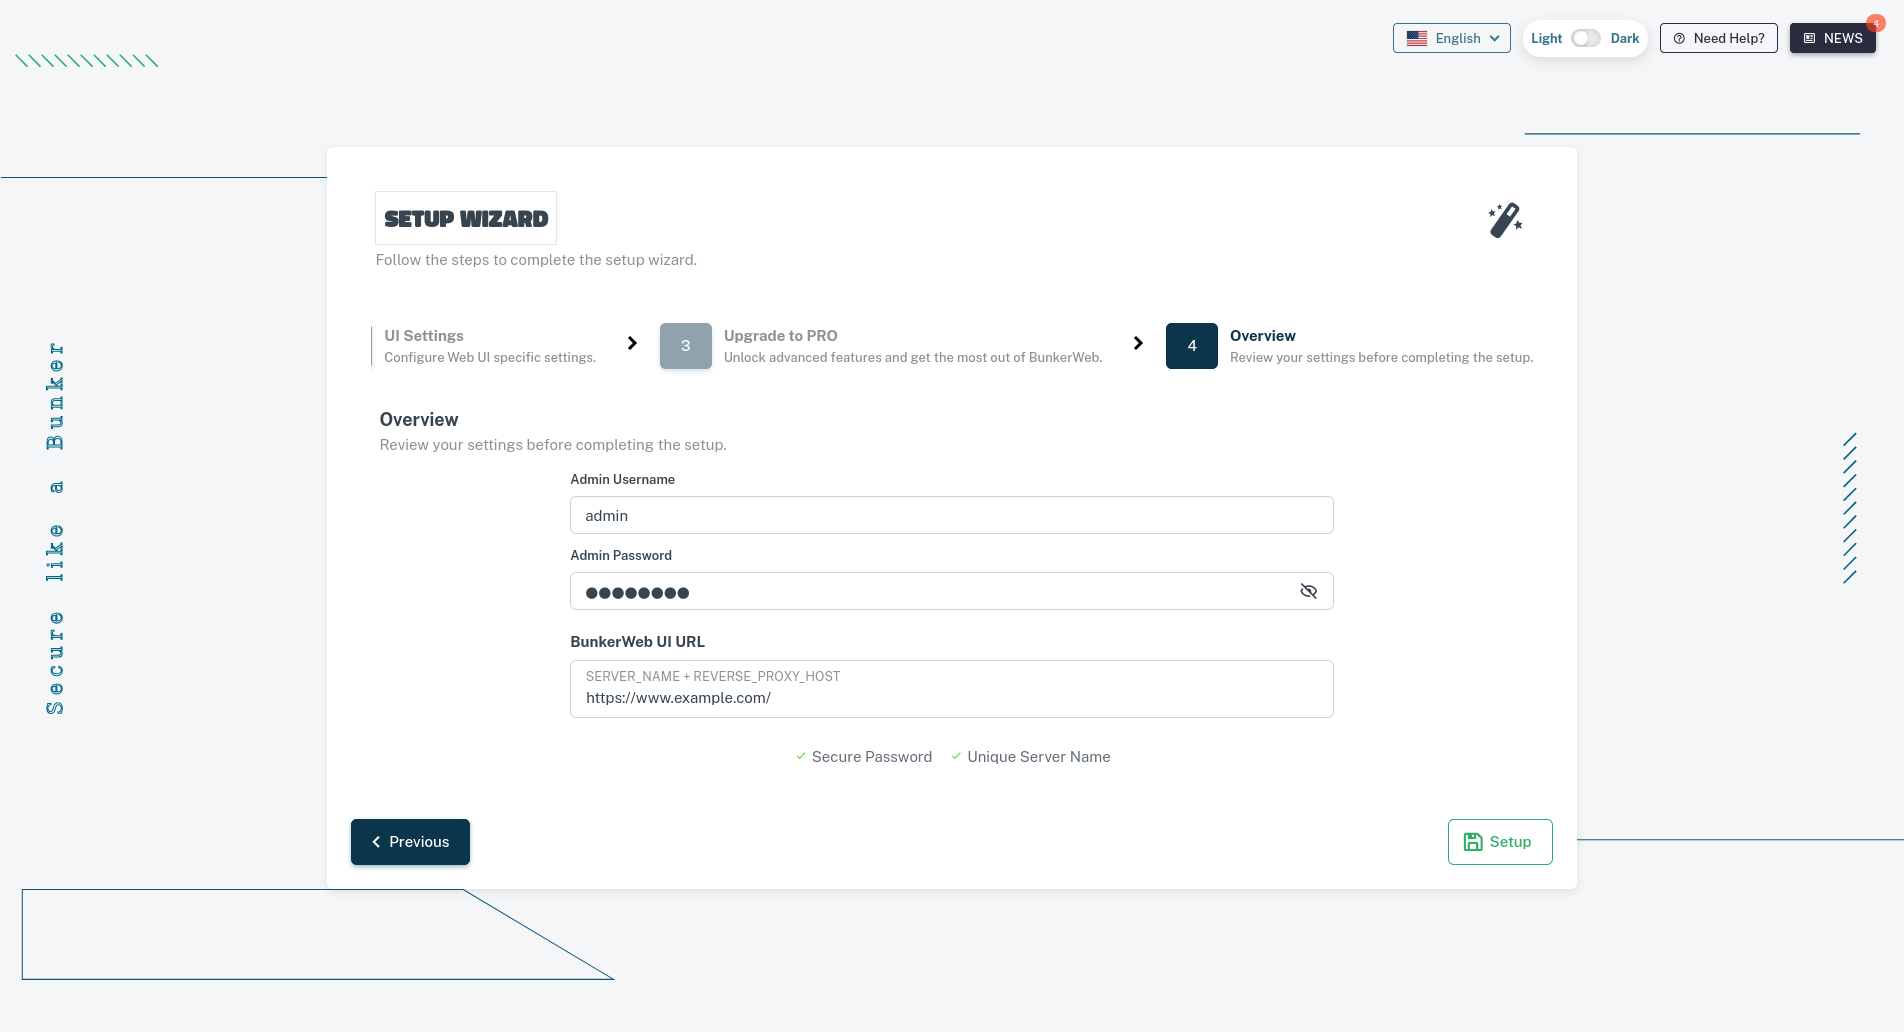
PRO activation
If you have a PRO license, you can activate it by entering your license key in the Upgrade to PRO section. This will enable the PRO features of BunkerWeb.
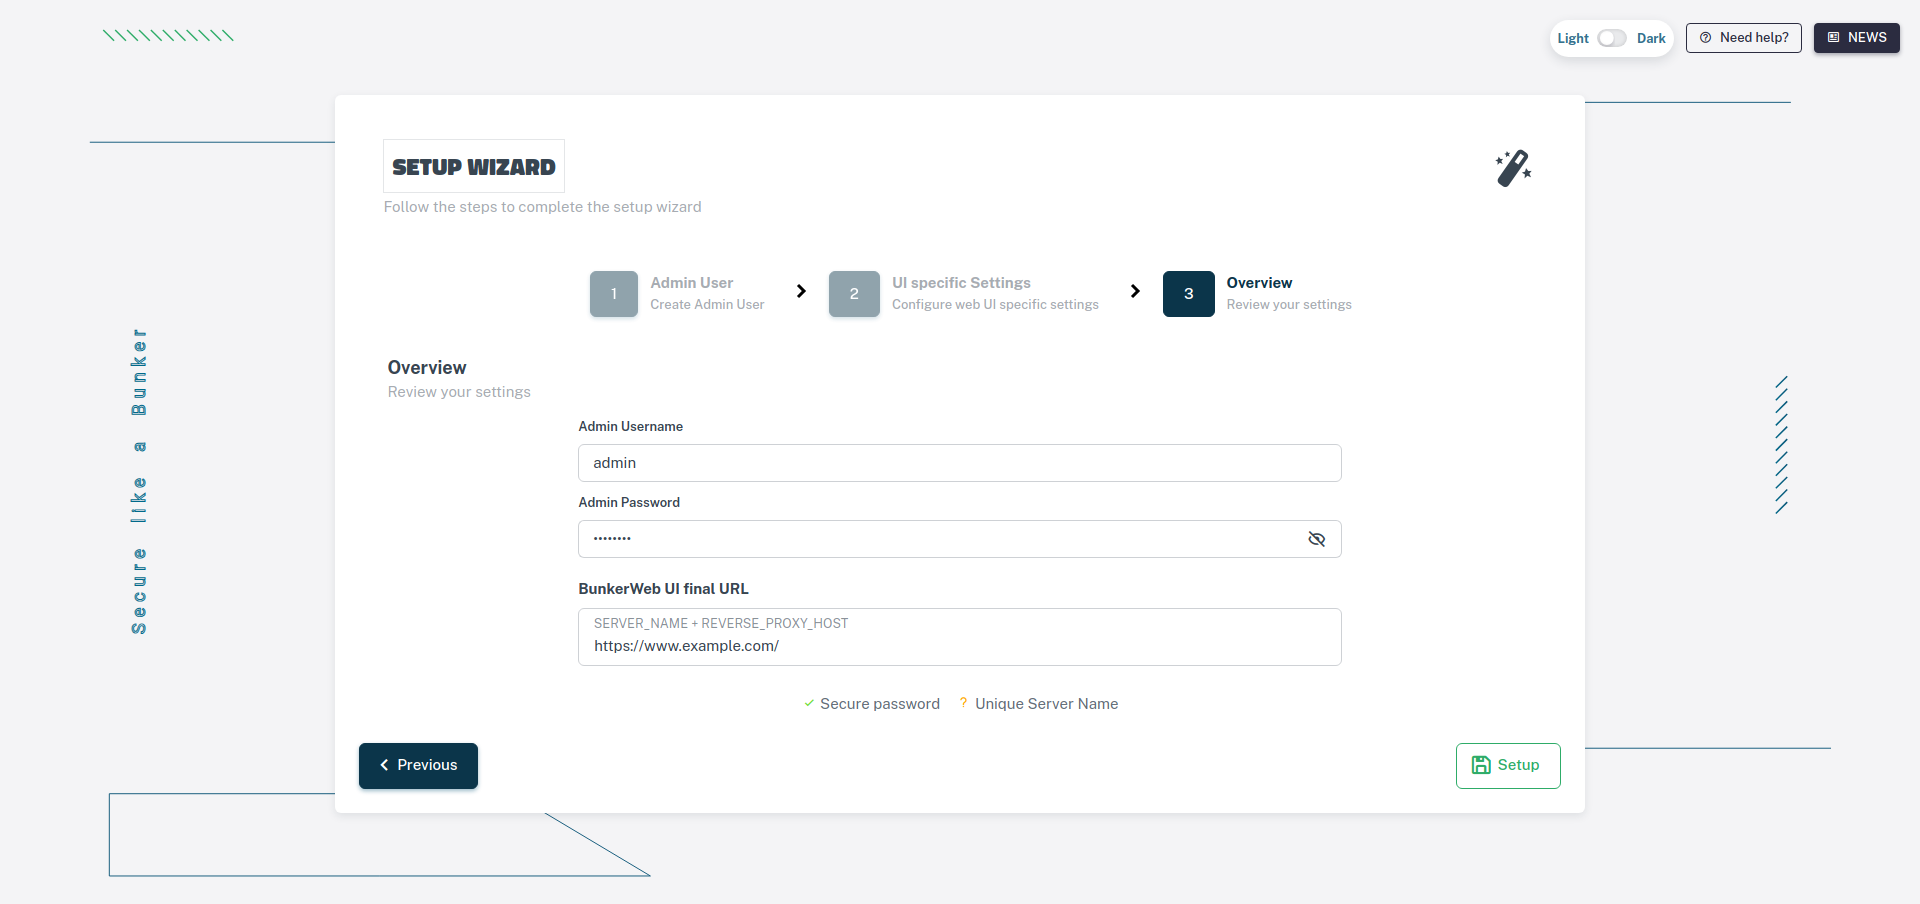
Overview of your settings
The last step will give you an overview of the settings you've entered. You can click on the "Setup" button to complete the setup.
Accessing the web interface
You can now access the web interface by browsing to the domain you configured in the previous step and the URI if you changed it (default is https://your-domain/).
You can now log in with the administrator account you created during the setup wizard.
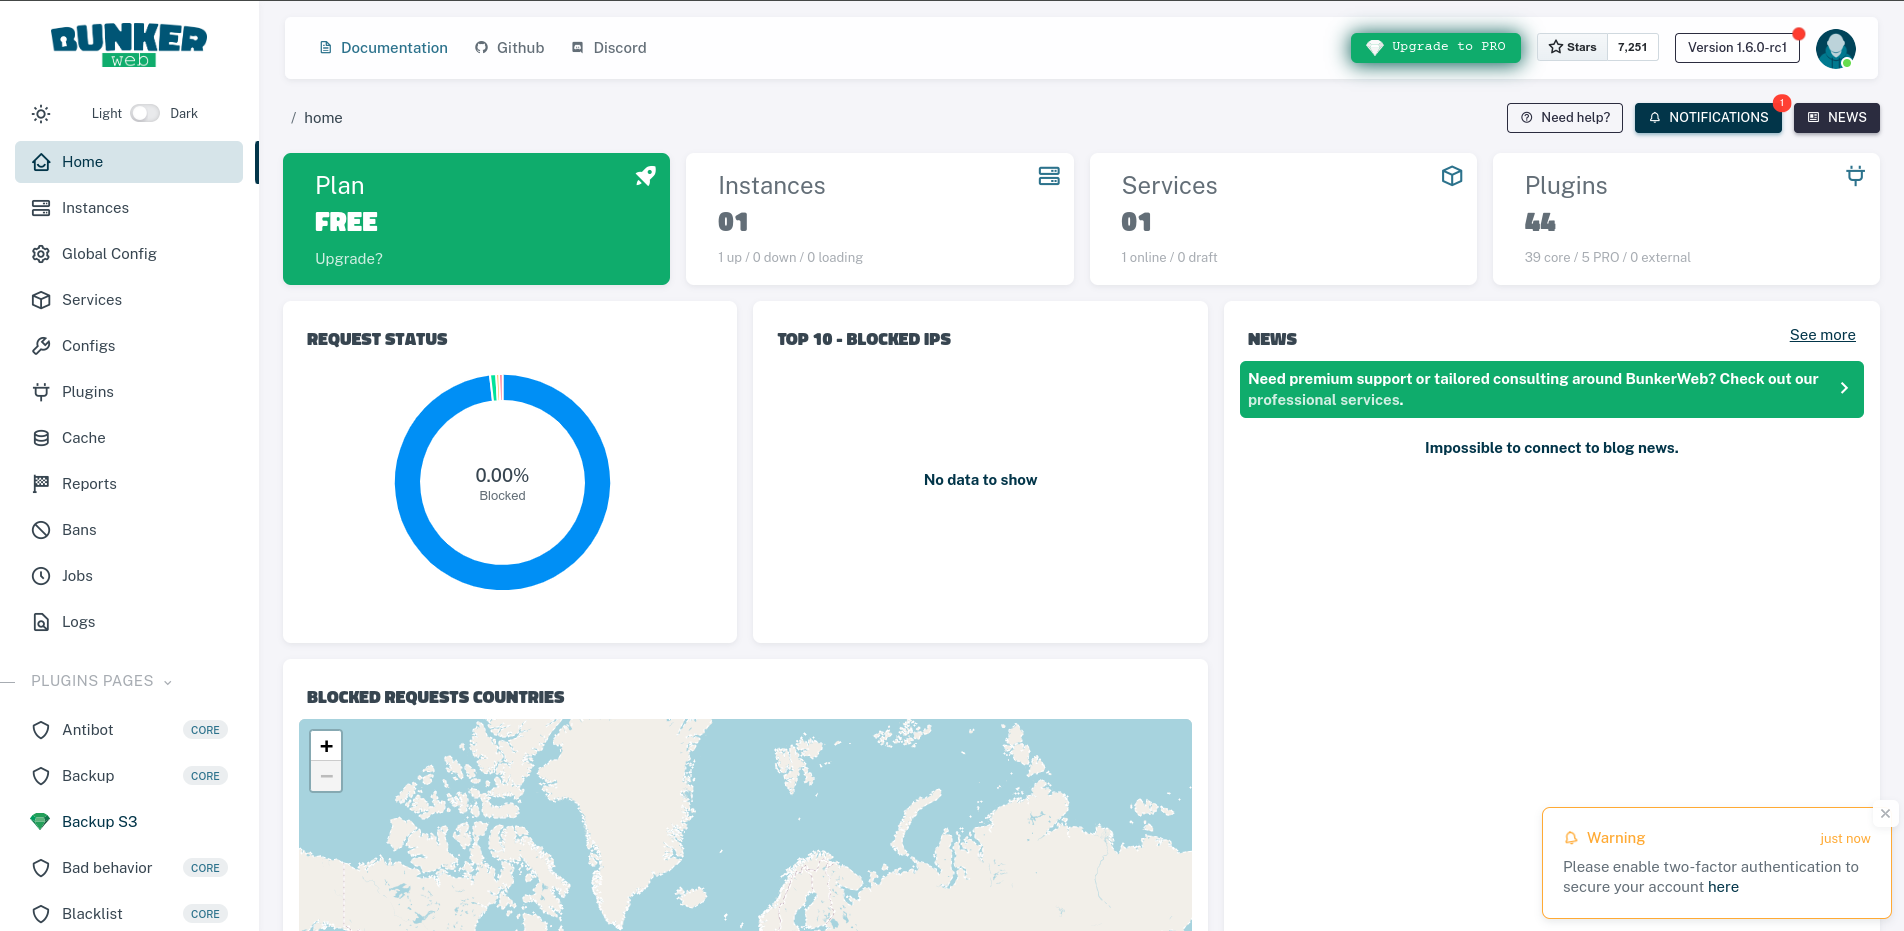
Creating a new service
You can create a new service by navigating to the Services section of the web interface and clicking on the ➕ Create new service button.
There are multiple ways of creating a service using the web interface:
- The Easy mode will guide you through the process of creating a new service.
- The Advanced mode will allow you to configure the service with more options.
- The Raw mode will allow you to enter the configuration directly like editing the
variables.envfile.
Draft service
You can create a draft service to save your progress and come back to it later. Just click on the 🌐 Online button to toggle the service to draft mode.
In this mode, you can choose among the available templates and fill in the required fields.
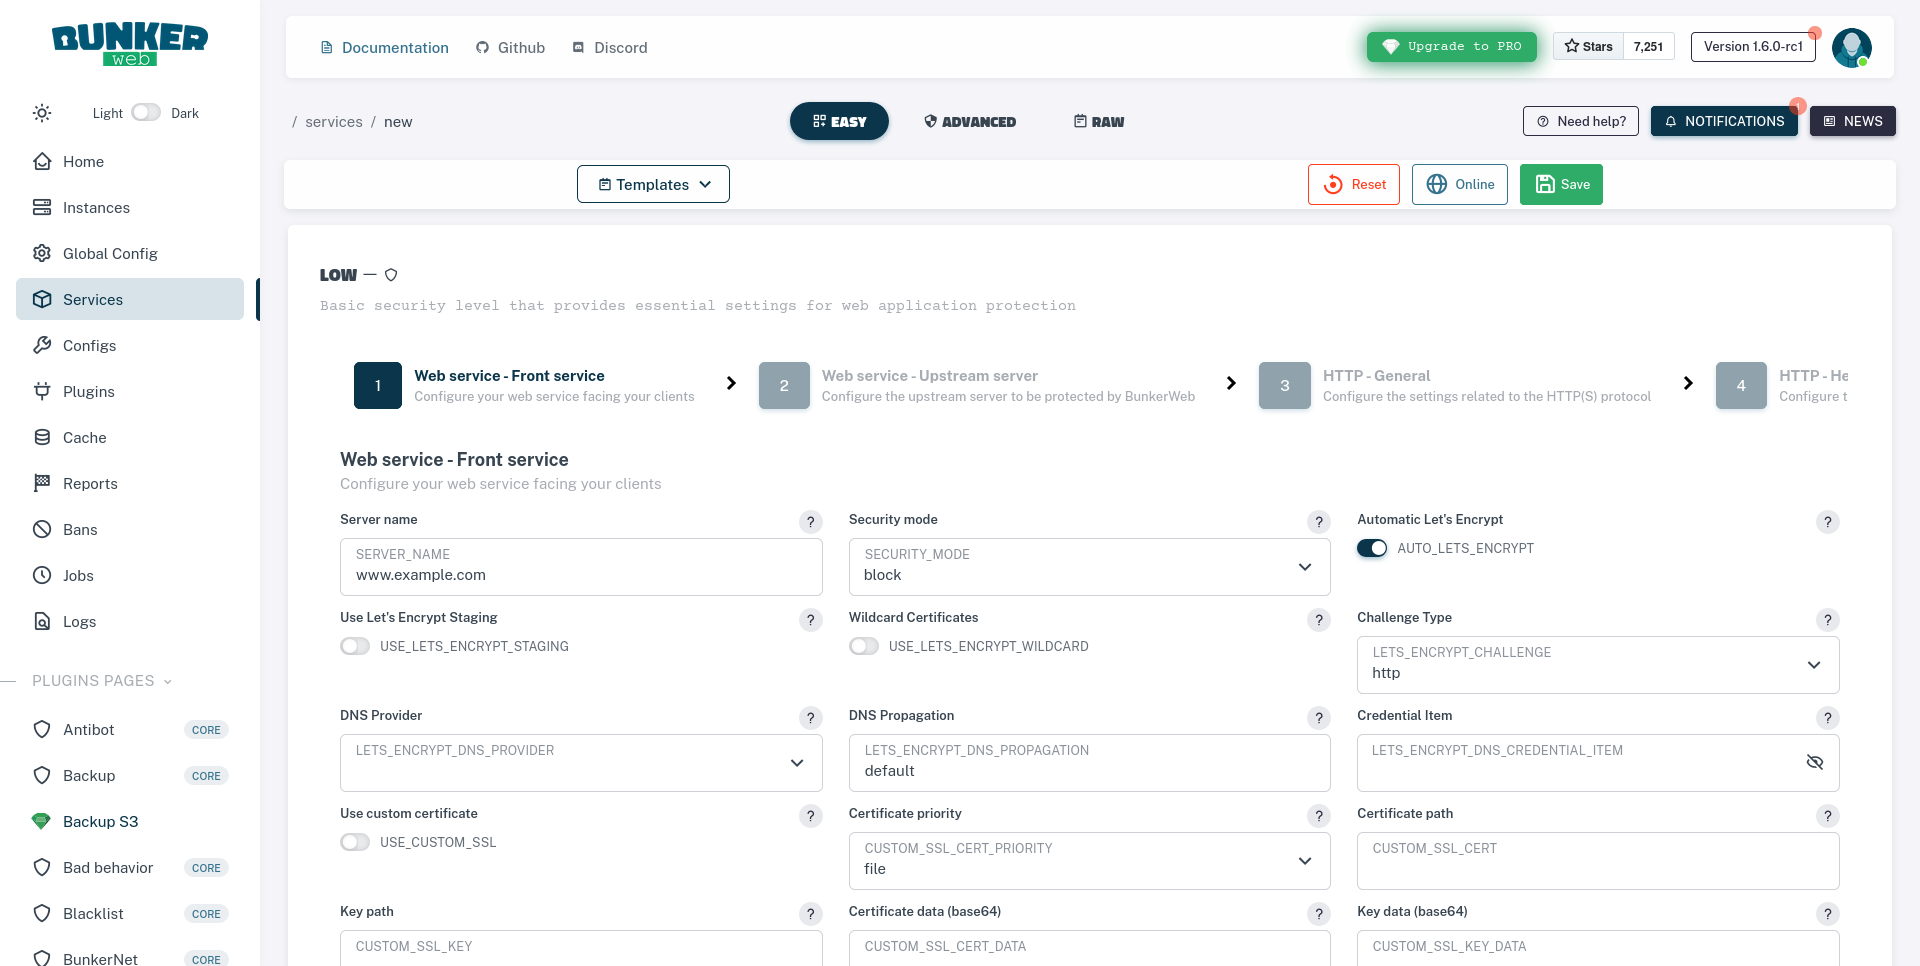
- Once you've selected the template, you can fill in the required fields and follow the instructions to create the service.
- Once you're done configuring the service, you can click on the
💾 Savebutton to save the configuration.
In this mode, you can configure the service with more options while seeing all the available settings from all the different plugins.
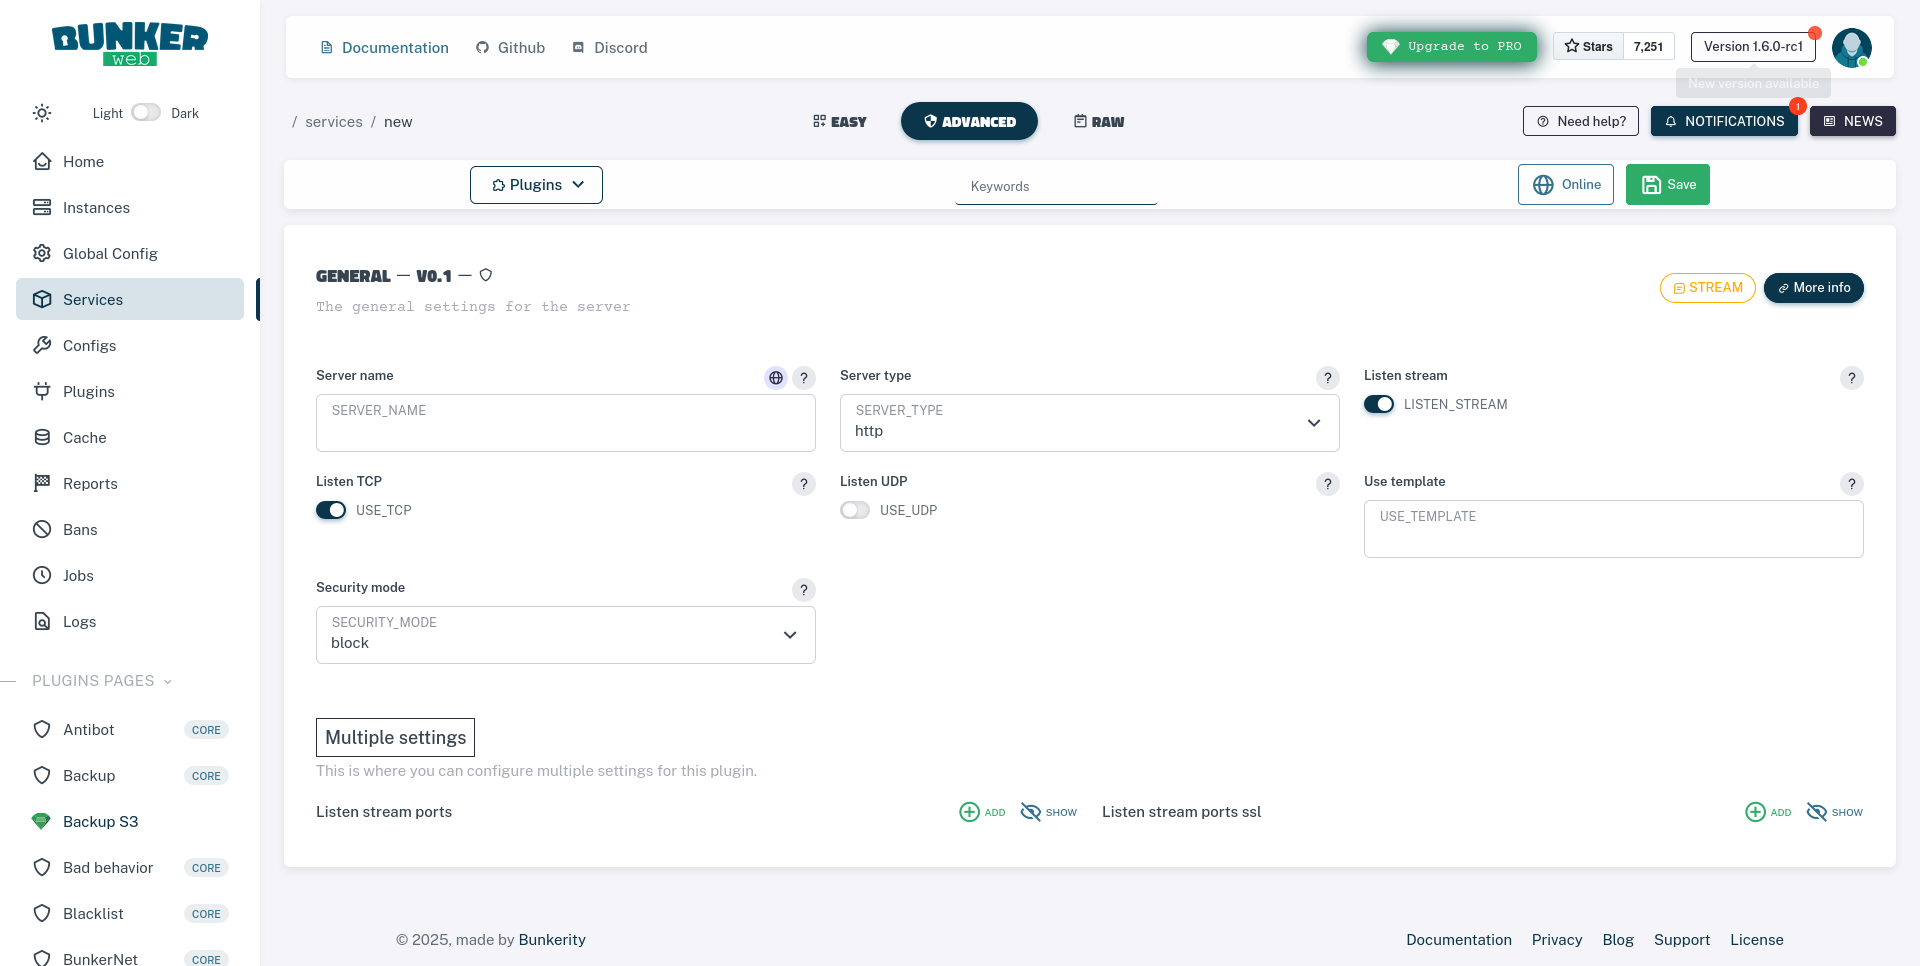
- To navigate between the different plugins, you can use the navigation menu on the left side of the page.
- Each setting has a small piece of information that will help you understand what it does.
- Once you're done configuring the service, you can click on the
💾 Savebutton to save the configuration.
In this mode, you can enter the configuration directly like editing the variables.env file.
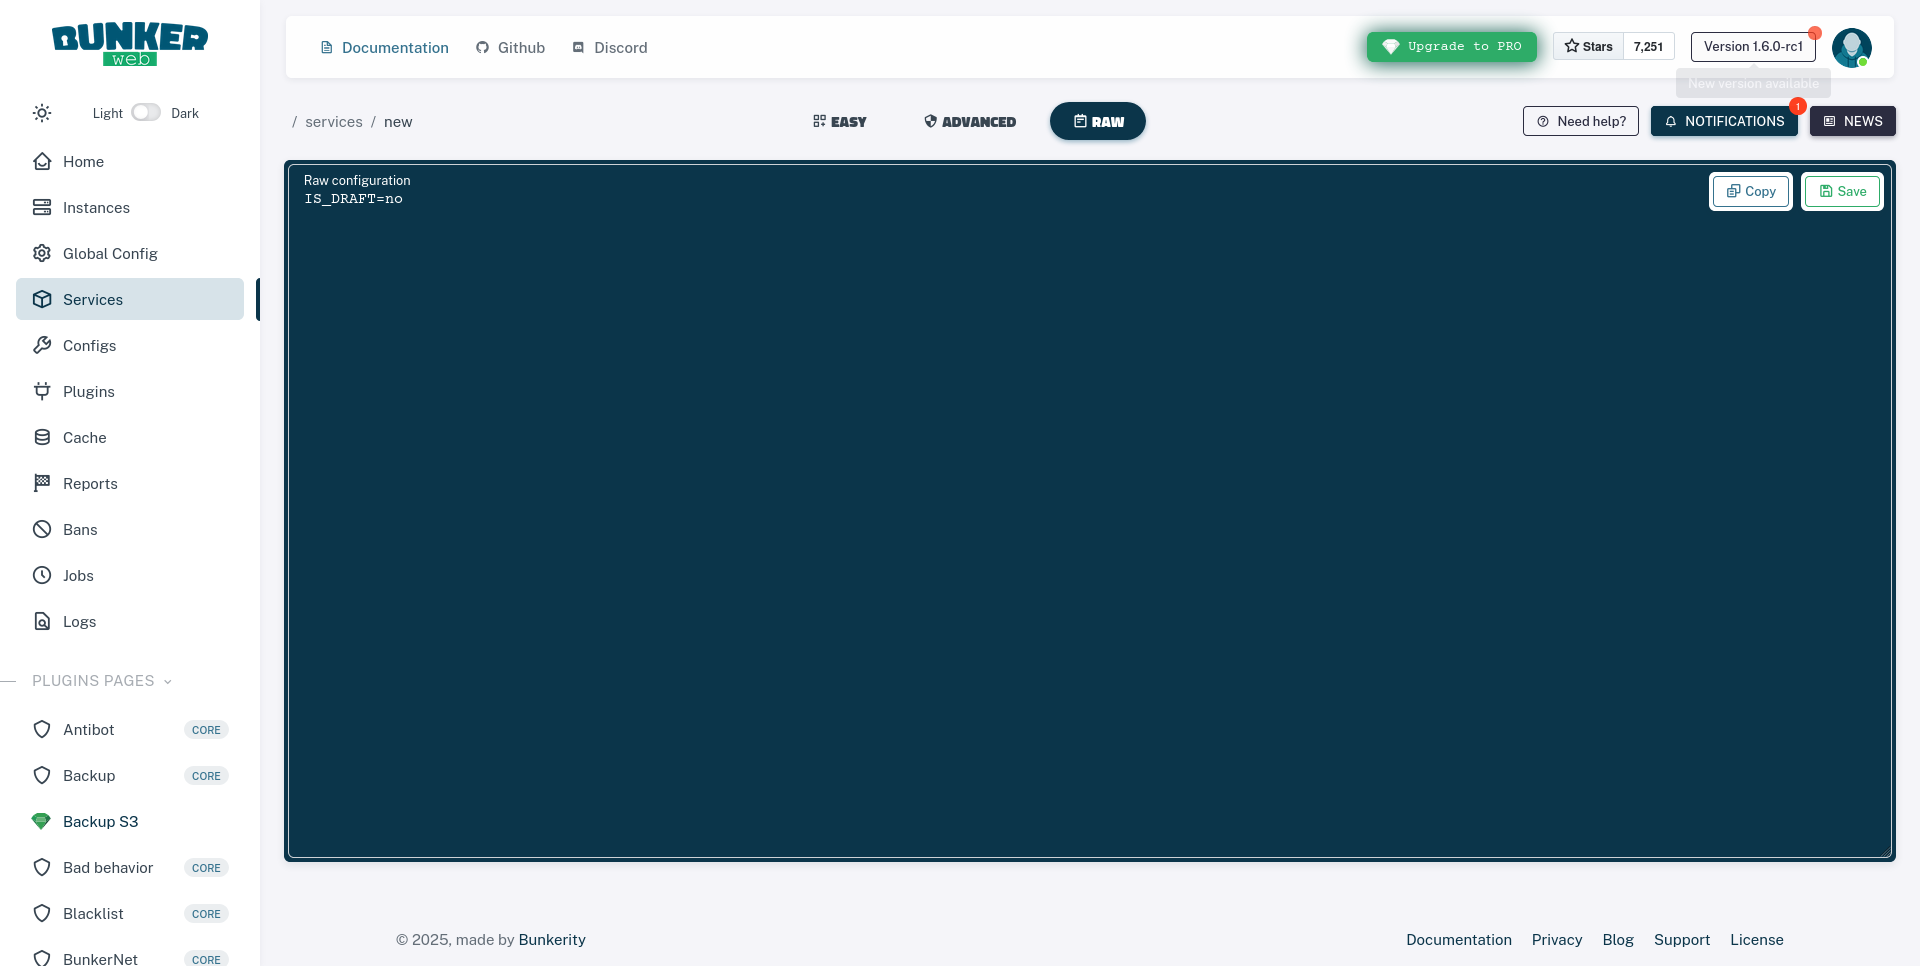
- Once you're done configuring the service, you can click on the
💾 Savebutton to save the configuration.
🚀 Once you've saved the configuration, you should see your new service in the list of services.
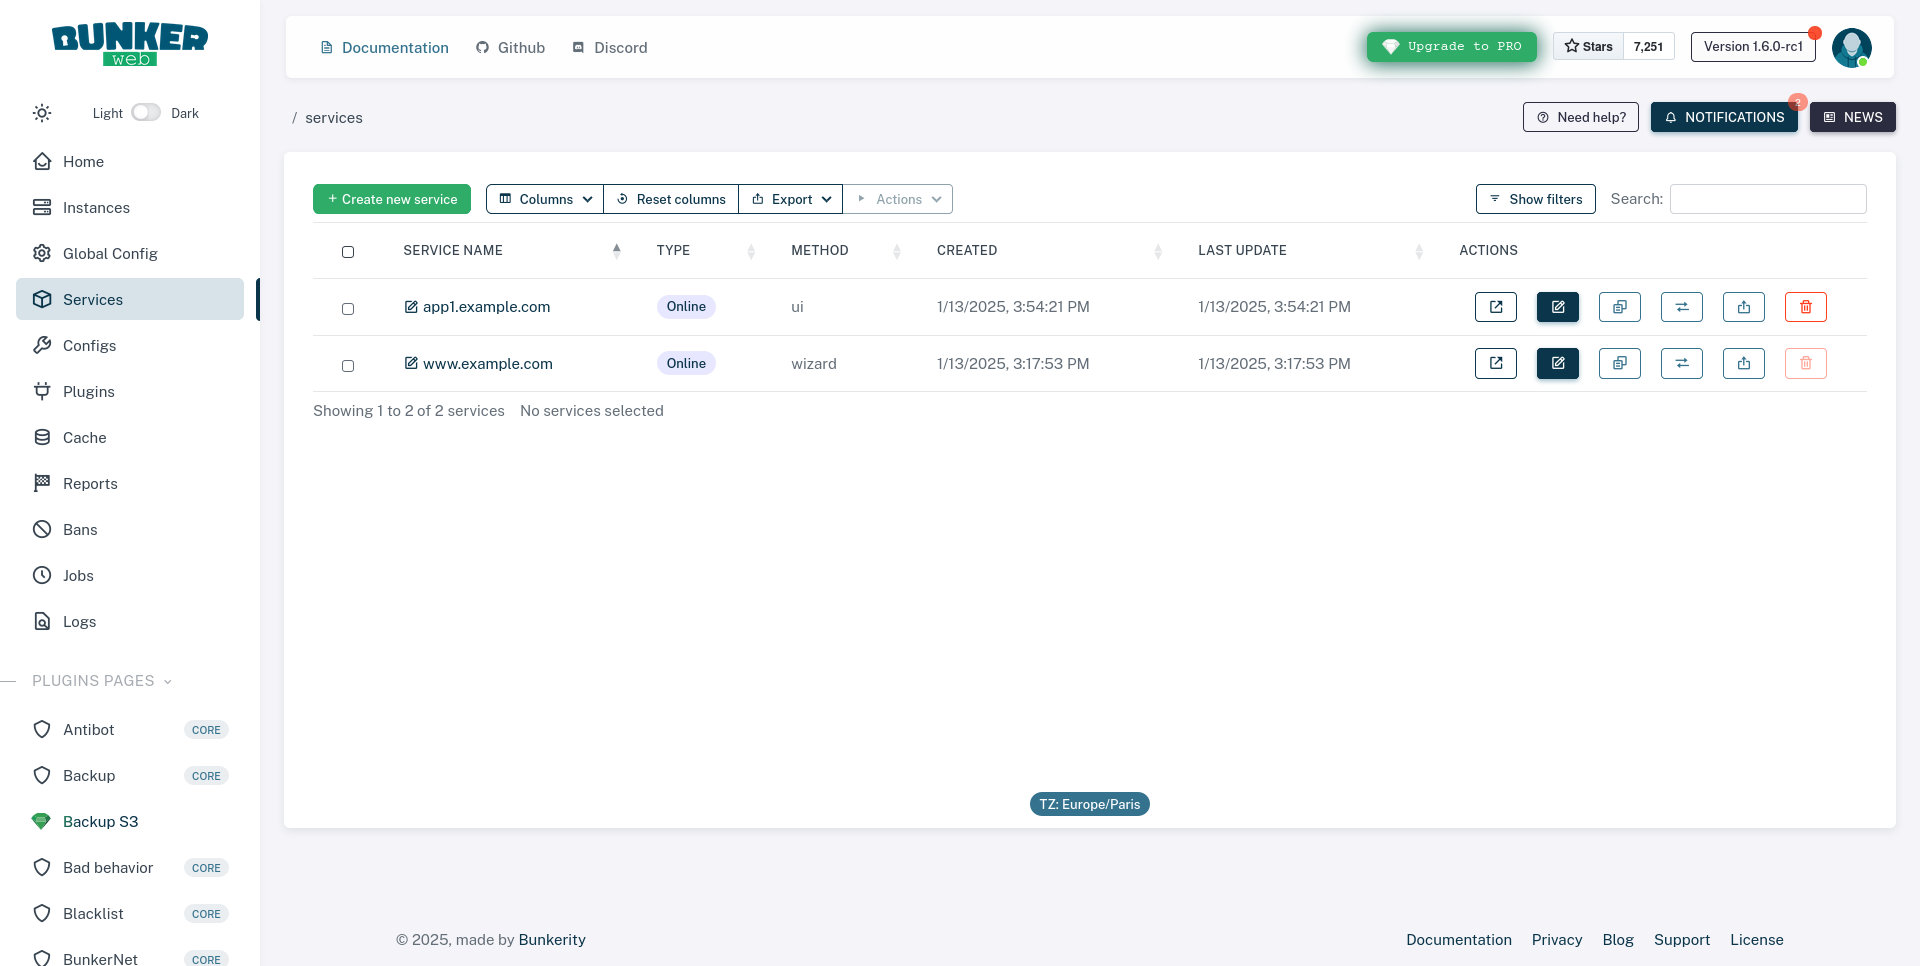
If you wish to edit the service, you can click on the service name or the 📝 Edit button.
When using the All-in-One image, new services are configured by adding environment variables to the docker run command for the bunkerweb-aio container. If the container is already running, you must stop and remove it, then re-run it with the updated environment variables.
Suppose you want to protect an application myapp (running in another container and accessible as http://myapp:8080 from BunkerWeb) and make it available at www.example.com. You would add or modify the following environment variables in your docker run command:
# First, stop and remove the existing container if it's running:
# docker stop bunkerweb-aio
# docker rm bunkerweb-aio

# Then, re-run the bunkerweb-aio container with additional/updated environment variables:
docker run -d \
  --name bunkerweb-aio \
  -v bw-storage:/data \
  -p 80:8080/tcp \
  -p 443:8443/tcp \
  -p 443:8443/udp \
  # --- Add/modify these environment variables for your new service ---
  -e MULTISITE=yes \
  -e SERVER_NAME="www.example.com" \
  -e "www.example.com_USE_REVERSE_PROXY=yes" \
  -e "www.example.com_REVERSE_PROXY_HOST=http://myapp:8080" \
  -e "www.example.com_REVERSE_PROXY_URL=/" \
  # --- Include any other existing environment variables for UI, Redis, CrowdSec, etc. ---
  bunkerity/bunkerweb-all-in-one:1.6.13
Your application container (myapp) and the bunkerweb-aio container must be on the same Docker network for BunkerWeb to reach it using the hostname myapp.
Network Setup Example:
# 1. Create a custom Docker network (if you haven't already):
docker network create my-app-network

# 2. Run your application container on this network:
docker run -d --name myapp --network my-app-network your-app-image

# 3. Add --network my-app-network to the bunkerweb-aio docker run command:
docker run -d \
  --name bunkerweb-aio \
  --network my-app-network \
  -v bw-storage:/data \
  -p 80:8080/tcp \
  -p 443:8443/tcp \
  -p 443:8443/udp \
#   ... (all other relevant environment variables as shown in the main example above) ...
  bunkerity/bunkerweb-all-in-one:1.6.13
Make sure to replace myapp with the actual name or IP of your application container and http://myapp:8080 with its correct address and port.
We assume that you followed the Basic setup and that the Linux integration is running on your machine.
You can create a new service by editing the variables.env file located in the /etc/bunkerweb/ directory.
nano /etc/bunkerweb/variables.env
You can then add the following configuration:
SERVER_NAME=www.example.com
MULTISITE=yes
www.example.com_USE_REVERSE_PROXY=yes
www.example.com_REVERSE_PROXY_URL=/
www.example.com_REVERSE_PROXY_HOST=http://myapp:8080
You can then reload the bunkerweb-scheduler service to apply the changes.
systemctl reload bunkerweb-scheduler
We assume that you followed the Basic setup and that the Docker integration is running on your machine.
You must have a network called bw-services so that you can connect your existing application and configure BunkerWeb:
services:
  myapp:
      image: bunkerity/bunkerweb-hello:v1.0
      networks:
        - bw-services

networks:
  bw-services:
    external: true
    name: bw-services
After that, you can manually add the service in the docker compose file that you created in the previous step:
...

services:
  ...
  bw-scheduler:
    ...
    environment:
      ...
      SERVER_NAME: "www.example.com" # When using the Docker integration, you can set the configuration directly in the scheduler, make sure to set the correct domain name
      MULTISITE: "yes" # Enable multisite mode so you can add multiple services
      www.example.com_USE_REVERSE_PROXY: "yes"
      www.example.com_REVERSE_PROXY_URL: "/"
      www.example.com_REVERSE_PROXY_HOST: "http://myapp:8080"
      ...
You can then restart the bw-scheduler service to apply the changes.
docker compose down bw-scheduler && docker compose up -d bw-scheduler
We assume that you followed the Basic setup and that the Docker autoconf integration is running on your machine.
You must have a network called bw-services so that you can connect your existing application and configure BunkerWeb with labels:
services:
  myapp:
      image: bunkerity/bunkerweb-hello:v1.0
      networks:
        - bw-services
      labels:
        - "bunkerweb.SERVER_NAME=www.example.com"
        - "bunkerweb.USE_REVERSE_PROXY=yes"
        - "bunkerweb.REVERSE_PROXY_URL=/"
        - "bunkerweb.REVERSE_PROXY_HOST=http://myapp:8080"

networks:
  bw-services:
    external: true
    name: bw-services
Doing so will automatically create a new service with the provided labels as configuration.
We assume that you followed the Basic setup and that the Kubernetes stack is running on your cluster.
Let's assume that you have a typical Deployment with a Service to access the web application from within the cluster:
apiVersion: apps/v1
kind: Deployment
metadata:
  name: app
  labels:
    app: app
spec:
  replicas: 1
  selector:
    matchLabels:
      app: app
  template:
    metadata:
      labels:
        app: app
    spec:
      containers:
      - name: app
        image: bunkerity/bunkerweb-hello:v1.0
        ports:
        - containerPort: 8080
---
apiVersion: v1
kind: Service
metadata:
  name: svc-app
spec:
  selector:
    app: app
  ports:
    - protocol: TCP
      port: 80
      targetPort: 8080
Here is the corresponding Ingress definition to serve and protect the web application:
apiVersion: networking.k8s.io/v1
kind: Ingress
metadata:
  name: ingress
  annotations:
    bunkerweb.io/DUMMY_SETTING: "value"
spec:
  rules:
    - host: www.example.com
      http:
        paths:
          - path: /
            pathType: Prefix
            backend:
              service:
              name: svc-app
              port:
                number: 80
Deprecated
The Swarm integration is deprecated and will be removed in a future release. Please consider using the Kubernetes integration instead.
More information can be found in the Swarm integration documentation.
We assume that you followed the Basic setup and that the Swarm stack is running on your cluster and connected to a network called bw-services so that you can connect your existing application and configure BunkerWeb with labels:
services:
  myapp:
    image: bunkerity/bunkerweb-hello:v1.0
    networks:
      - bw-services
    deploy:
      placement:
        constraints:
          - "node.role==worker"
      labels:
      - "bunkerweb.SERVER_NAME=www.example.com"
      - "bunkerweb.USE_REVERSE_PROXY=yes"
      - "bunkerweb.REVERSE_PROXY_URL=/"
      - "bunkerweb.REVERSE_PROXY_HOST=http://myapp:8080"

networks:
  bw-services:
    external: true
    name: bw-services
Going further
Congratulations! You have just installed BunkerWeb and secured your first web service. Please note that BunkerWeb offers much more, both in terms of security and integrations with other systems and solutions. Here's a list of resources and actions that may help you continue to deepen your knowledge of the solution:
- Join the Bunker community: Discord, LinkedIn, GitHub, X (Formerly Twitter)
- Check out the official blog
- Explore advanced use cases in the documentation
- Get in touch with us to discuss your organization's needs